
Bikepacking is the lovechild of mountain biking and lightweight camping and an increasingly popular way to explore the great outdoors.
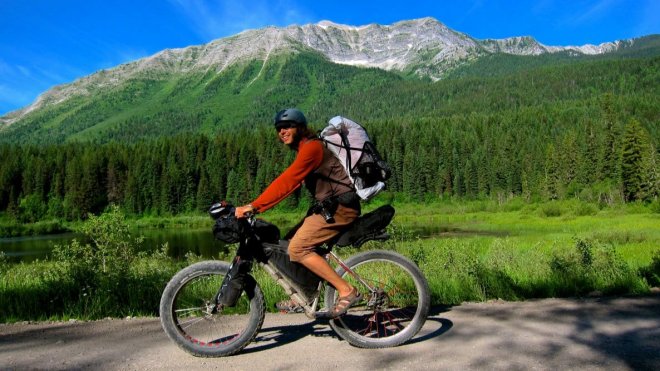
Bikepacking 101 – How to Get Started – Photo Courtesy: Vik Approved @ Flickr
For most people, bikepacking’s allure stems from its inherent minimalism: no fancy cycling setup or lavish trekking experience are required to get started. Instead, all you need is your trusty mountain bike and some essential backpacking gear, and you’re fixed for an off-road adventure of a lifetime.
Bikepacking provides modern nature enthusiasts with the best of both worlds. On the one hand, you cover a lot more ground than you would by hiking (about 3x as much), while at the same time having access to dirt roads and makeshift trails unusable, or very difficult to use, by camper vans and cars.
Each ride is wholly customizable and the possibilities are endless – you can opt for a quick overnighter, or try one of the massive cross-country trails that last for weeks on end (matter of fact, I’m planning a 300 km bikepacking ride from London to Bristol later this year. Wish me luck!)
But perhaps its greatest trait lies in bikepacking’s unique ability to cater to all types of outdoor explorers. Not only does it work as a fun weekend activity with family or friends, it can just as easily be a profound solitary experience for those looking to reconnect with nature – and themselves.
The Ideal Bike
Mountain bikes often make the perfect bikepacking steeds, mainly due to rugged terrain and an increased need for stability. That being said, almost any bike that can mount storage bags or handle additional racks is a valid contender.
Your bike choice can also depend on the route’s technical difficulty. Take it from a seasoned bike mechanic – no bicycle handles all terrain equally well. Snowy or sandy trails, for example, will often require fat, reinforced tires, whereas classic dirt roads are typically far more accommodating.
At the end of the day, start with what you have. If you already own a hybrid or mountain bike that is proven trail-worthy, it will probably work just fine with a few (minor) modifications. If not, there are plenty of secondhand cross-country bikes that are both cheap and great for carrying your gear. Speaking of which…
The “Superbags”
Bikepacking’s growing popularity could be blamed on the rise of lightweight bags and improved cycling mounts over the last decade. The traditional rack-and-pannier setup, for example, weighs at least 4 kilos pre-gear. In comparison, all bikepacking bags combined typically clock in at around 1.5 kg, allowing for a much smoother riding experience.
These bike-specific bags include a frame bag, seat pack, handlebar bag, and various peripherals. They help maximize your bike’s capacity without glaringly sacrificing its stability, and the way it handles terrain. You can find them online or – if you know your way around a sewing machine – even make your own!![]()
So what do you actually put in all those bags?
Essential Gear
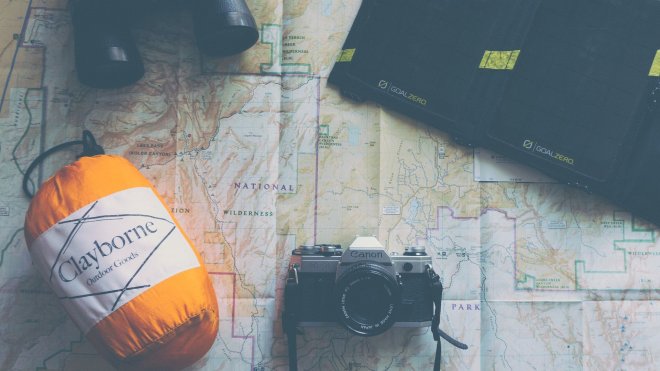
Bikepacking 101 – Essential Gear – Photo Courtesy: Cameron Kirby @ Unsplash
I don’t know if Baloo from Jungle Book does a lot of backpacking, but he sure has the right idea. When packing your bags, always look for the bare necessities. In essence, bikepacking gear is nothing more than standard backpacking gear with a few bike-specific items (repair kit, extra tubes, tire pump, etc.).
In no particular order, your gear should include:
1. A decent sleeping bag – although comfort is important, compactness and weight should be the deciding factors when choosing your setup. If you don’t want to break the bank, foam sleeping pads are light (albeit bulky…), affordable and help insulate you from the cold. If you want other backpackers’ envy tho, the air pads can cost a pretty penny but are both comfy and very easy to pack.![]()
2. Food and kitchen utensils – unless you’re Bear Grylls, you’ll want to get a compact stove and pack some aluminum pots. Of course, the complexity of your setup will largely depend upon the length of your ride.
3. Water – Bikepacking is thirsty work, even more than regular hiking. You’ll want to drink at least 5L of water per day, yet really don’t want to be carrying anything more than 2 liters per person – it’s just too much dead weight.
The best way around this conundrum is to make sure your overnight camping locations are near some form of stream, river or lake. Then, get yourself a water purifier (I have a Katadyn Gravity Camp which can filter 2L/minute and weighs only 320g) and you are set for dinner, breakfast, and the entire next day’s ride.![]()
4. Miscellaneous – being prepared is critical, so don’t leave the house without a basic bike repair kit and a wilderness first aid kit. A dedicated GPS unit is often a vital component of most bikepacking adventures. Always carry a spare battery for your phone, and if you’re planning on doing a cross-country trail, consider getting a GPS tracker that can alert your loved ones or professional services.
Of course, many items are going to be trail-specific. You may want to bring an extra pair of shoes if you plan on having camp or rest days. A small, thin tarp to protect your bike goes a long way when riding in the rain. Likewise, investing in a strong bike light is a given if you’re saddling up at night. At the end of the day, research and common sense are bikepacker’s best friends.![]()
Choosing Your Route
Unlike most backpacking routes that are pre-packed with plenty of info and relevant maps, choosing a good bikepacking route can be a bit more tedious. Bikepacking is a relatively new concept so many rides are still undocumented, although a dedicated community is working hard to change that. There are some excellent resources online, providing a detailed overview of the many established routes all throughout the world.
For planning a local bikepacking ride, there’s no better tool than Google Earth. Detailed satellite imagery allows you to closely examine the neighboring terrain, and determine just how suitable it is for biking. When drafting your own route, make sure to keep your fitness and skill level in mind, and include a healthy mix of both rideable and “adventurous” terrain.
So there you have it – saddle up, have fun and I’ll see you on the road!
Pingback: Slow Our Rolls – ITH & SB
Good biking tips. Thanks
A lot of information. Good tips thanks. I love this post.
I’m a big fan of bikepacking – it combines the scenery and thrill of hiking and camping with riding, and it’s a great family or group activity. Like you said, it’s important to be prepared – be picky with what you pack. Packing lighter is always the best option, chances are you won’t use most of the things that you think you will! Great read and thanks for sharing!
Great post! Thank you for the guidelines for the miscellaneous, I never know what to take with me besides the essentials.